
How to install an eSIM
Add the eSIM you bought from Juvega to your phone by scanning its QR code.
Your eSIM is delivered as a QR code. Installing it takes about two minutes and needs an internet connection (Wi-Fi is fine).
Before you start: make sure your phone is eSIM-compatible and network-unlocked. Keep the QR code open on another screen, or print it. Do not scan it from the same phone you are installing it on.
Android (including Google Pixel and GrapheneOS)
- Buy your eSIM from the Juvega shop and open the email or order page that contains the QR code.
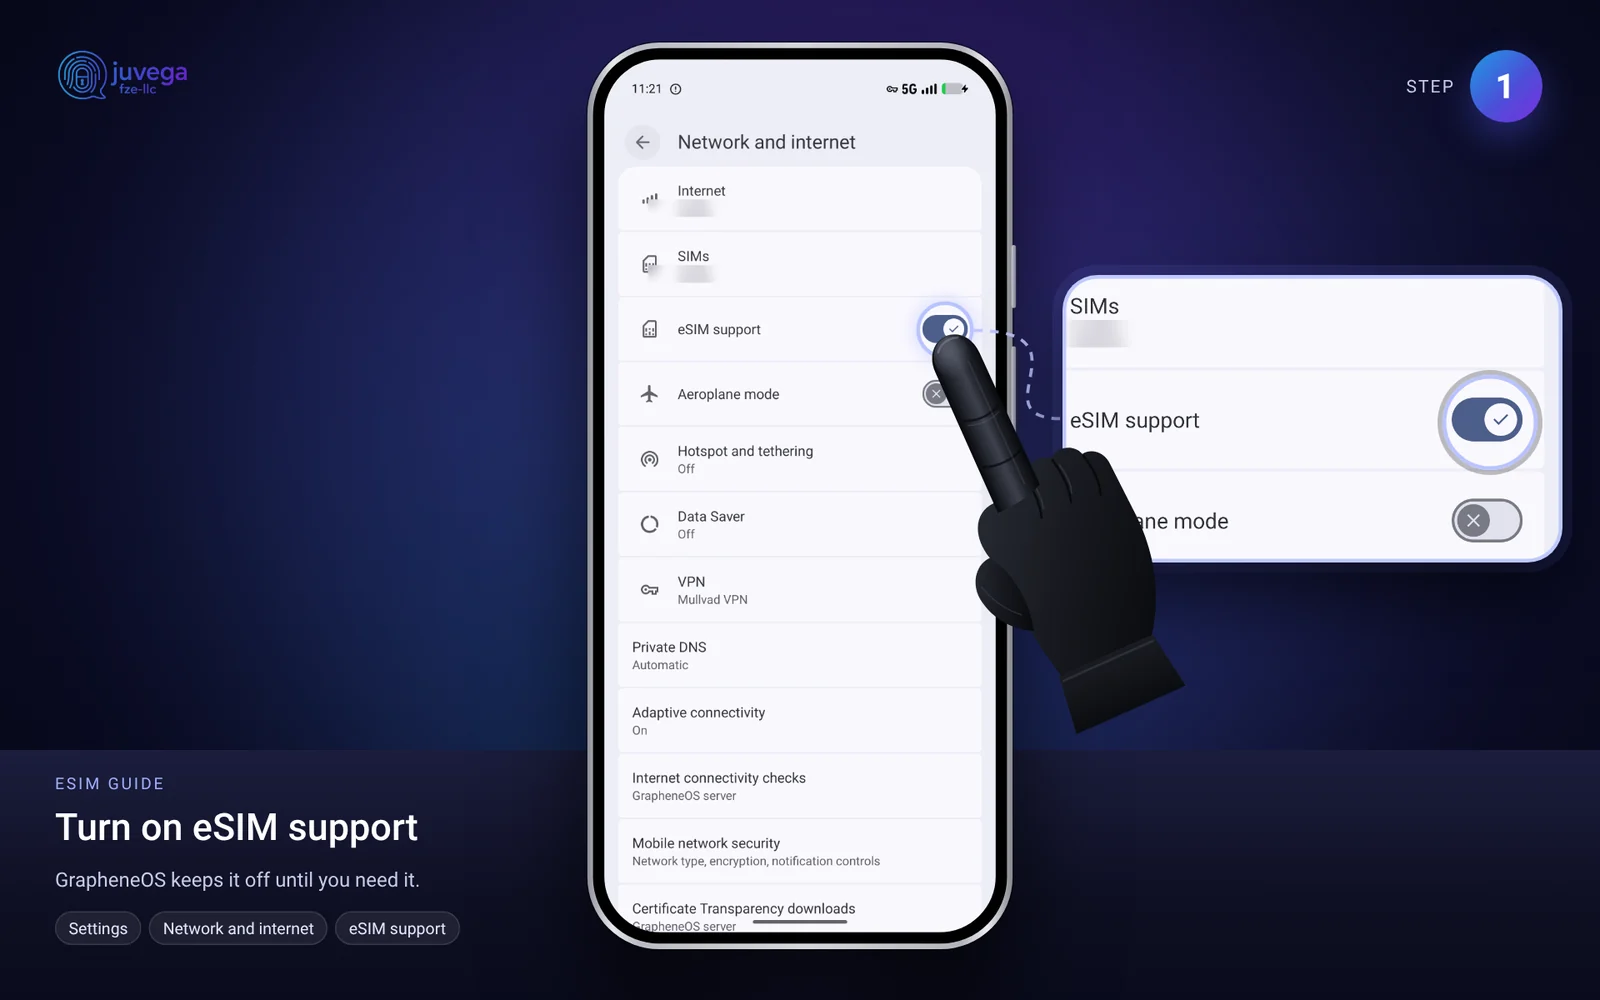
- Open Settings, then Network and internet. On GrapheneOS, first turn on eSIM support (it stays off until you need it). Then tap SIMs.
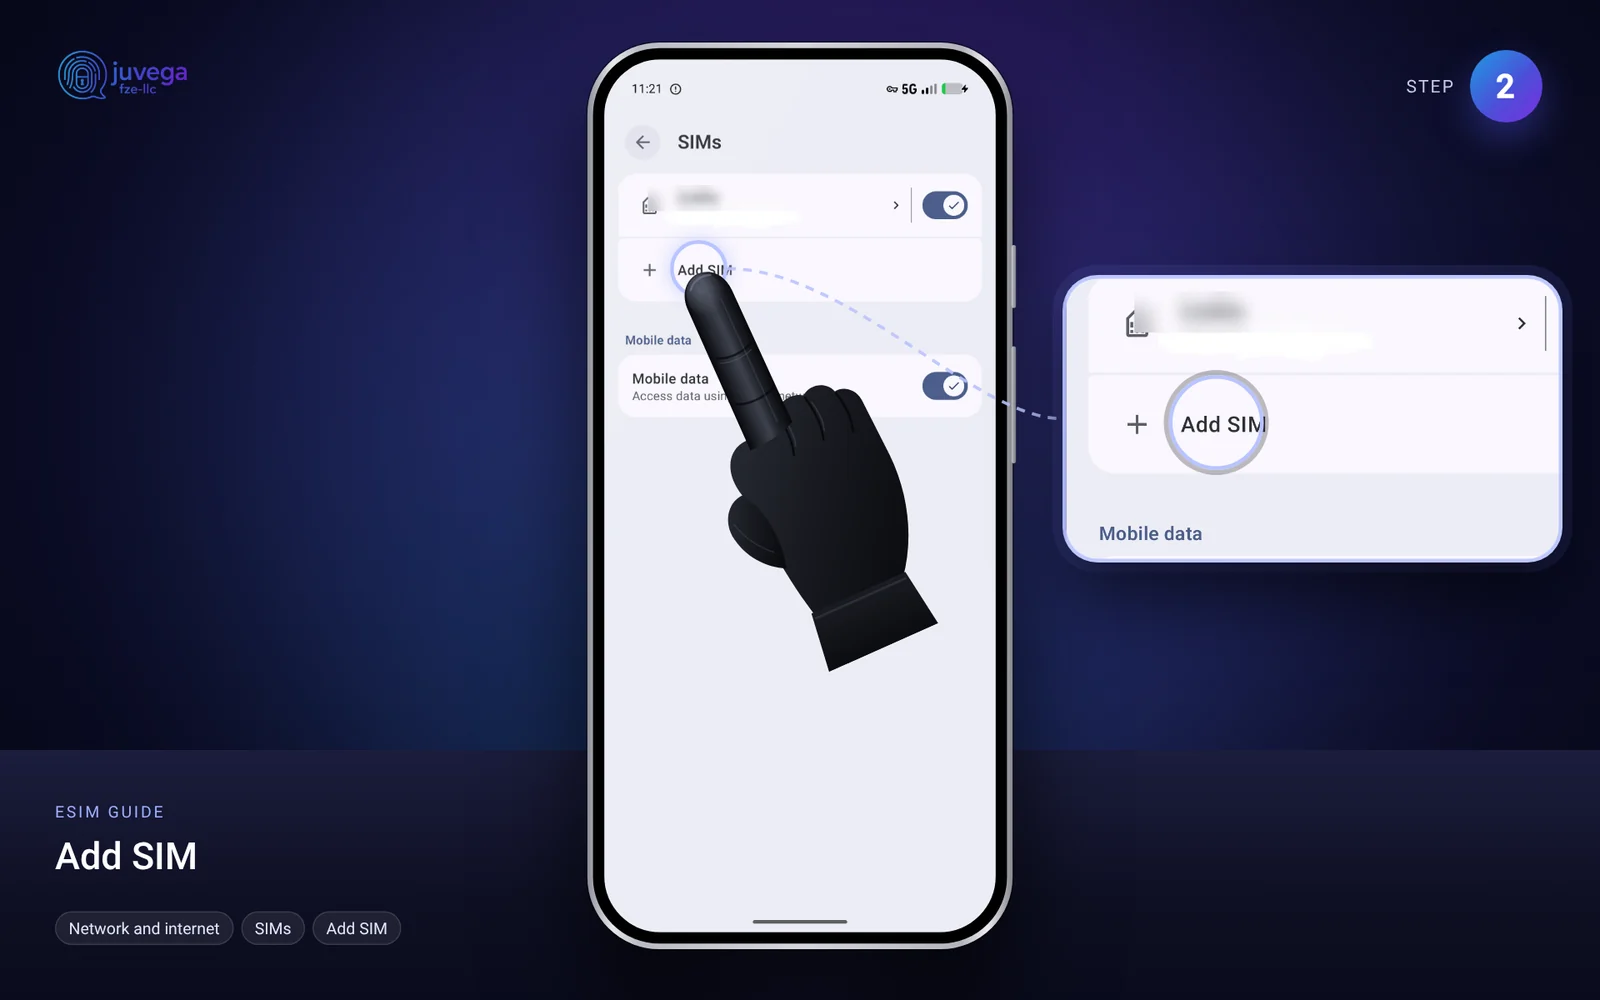
- Tap + Add SIM (on some phones it is called Add eSIM or Download a SIM instead).
- Choose Set up an eSIM and scan the QR code you received from Juvega.
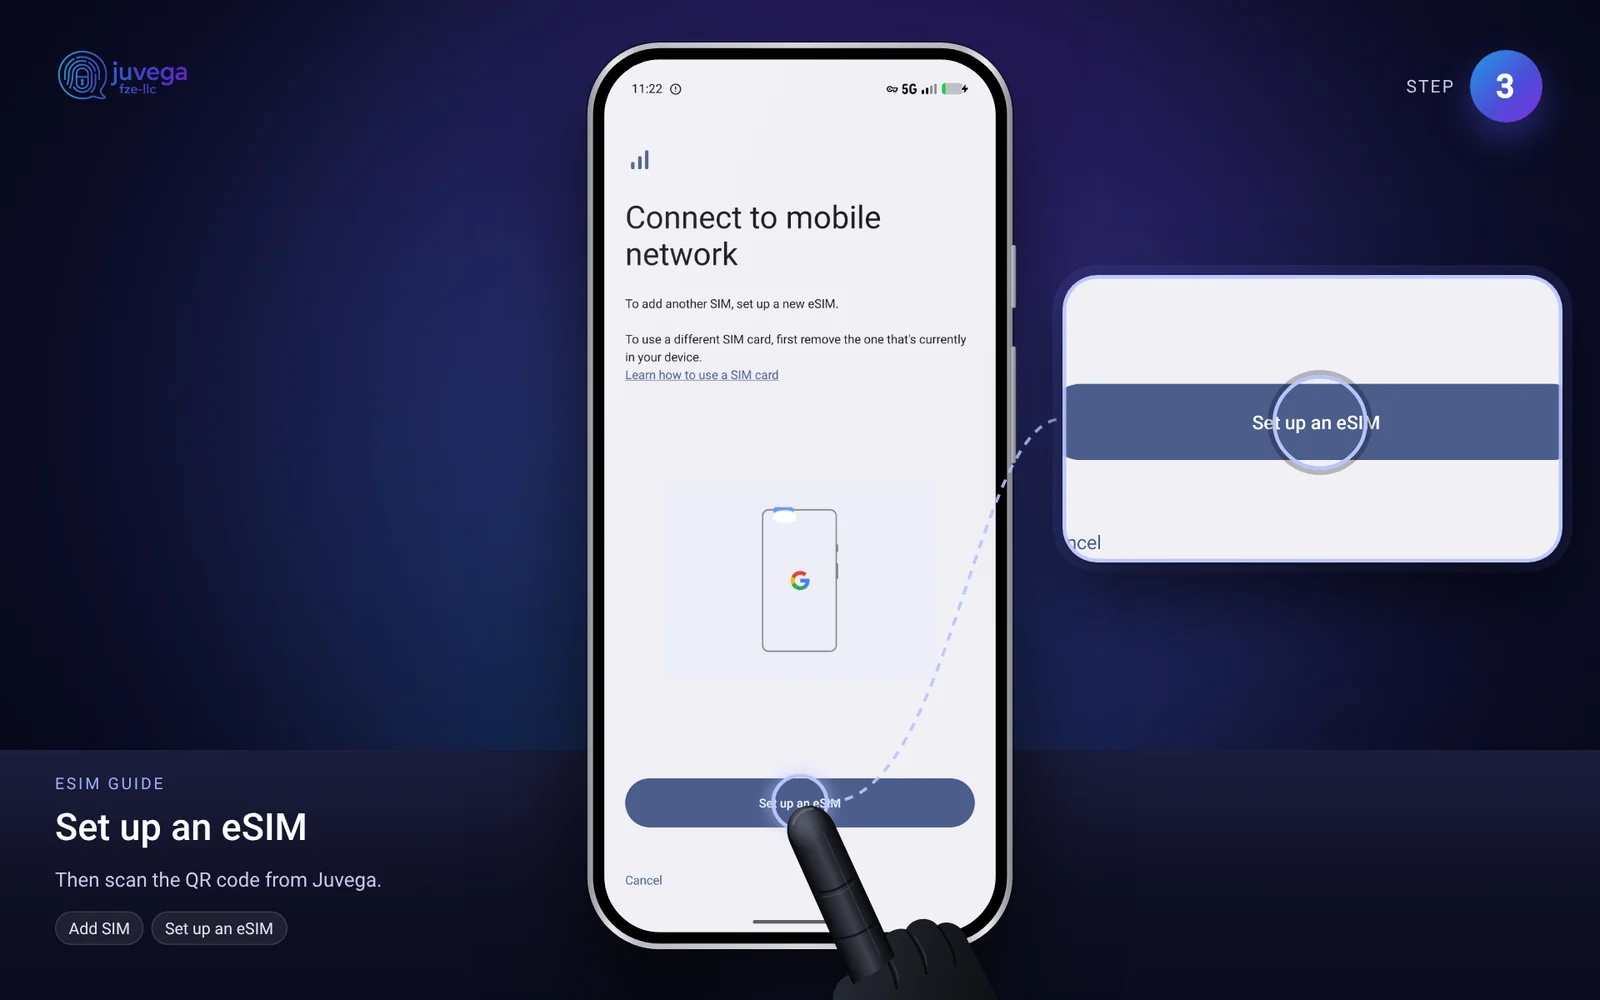
- Wait for the plan to download, then tap Set up or Activate.
- Turn the eSIM on. Under Settings > Network and internet > SIMs, make sure Mobile data is set to the new eSIM when you are travelling.
- Turn on Data roaming for the eSIM if your plan is for a country you are visiting.
iPhone
- Open Settings, then Mobile Data (or Cellular).
- Tap Add eSIM, then Use QR Code.
- Scan the QR code and follow the prompts.
- Label the plan, for example "Travel", and choose it for Mobile Data.
- Turn on Data Roaming for the new plan if needed.
Tips
- Install the eSIM before you travel, but only switch it on when you arrive. Many plans start counting days from first connection.
- A QR code can normally be used once. If installation stops halfway, do not delete the eSIM and do not scan again. Contact us and include your order number.
- Keep your normal SIM turned on for calls and texts if you want to stay reachable on your usual number.
Troubleshooting
- "Unable to add eSIM": check your internet connection, restart the phone and try again.
- No data after installing: switch Mobile data to the eSIM, turn on Data roaming and restart the phone.
- Still stuck: use the contact page and tell us your phone model and what message you see.
Comments
Loading comments…